Hello friends, In this tutorial, we share the best way to convert your default Android status bar to the Material Status bar on your Android device. I sure you are interested ?. in the post we share the two way one is rooted method and other is an unrooted method.
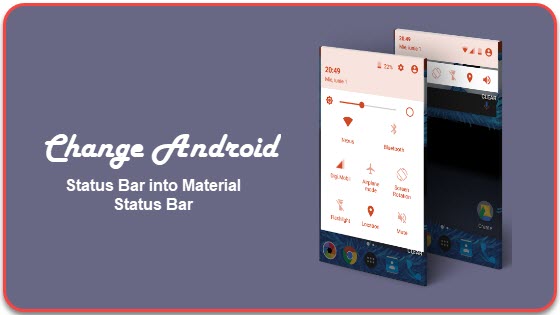
What is Material Status Bar?
A question comes to your mind what is Material Status Bar !!!!
This is a tinted status bar. It changes your status bar like a lollipop and jellybean device. The difference between the default and the Material is that its color. One is dark or transparent and the other is colorful.

Another goal of this is to support AppCompat Toolbar. To get more knowledge from here.
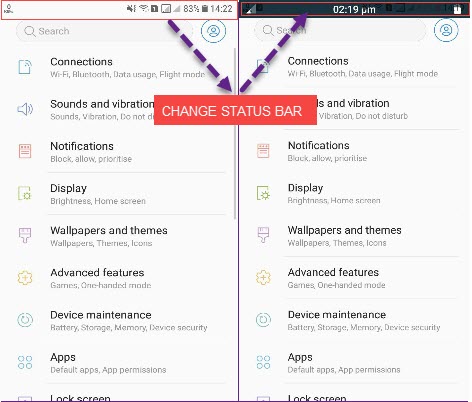
#1. Change Material Status Bar on Unrooted Device
This is a long process but easy to understand. So read this step-by-step guide and do this on your Android device. we are using application for experiment and got success. So, I share my whole experiment with a screenshot.
Use Material Status Bar Apk By Treydev Inc
Step-1 First, Install the App Material Status Bar Apk from play store or Below Button.
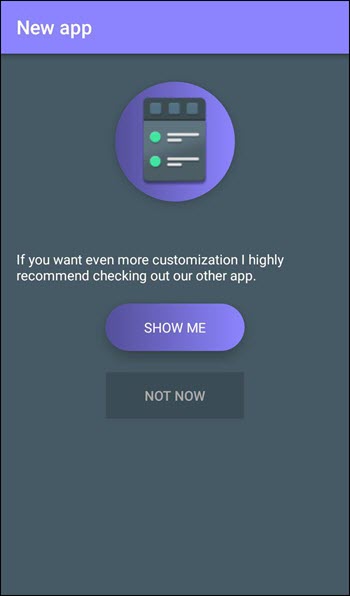
Step-2:Open the application and hit on the NOT NOW option.
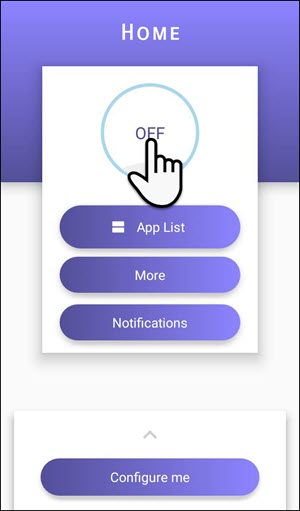
Step-3:Default the application is off. So, hit on the switch.
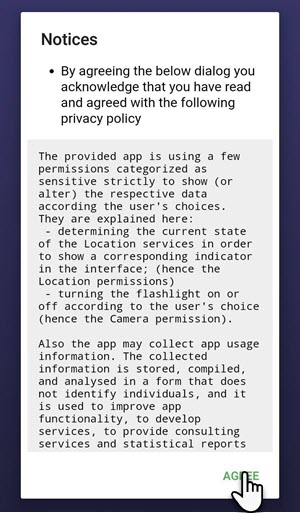
Step-4:Notice page will show it Write. Click on agree button .
By agreeing the below dialog you acknowledge that you have read and agreed with the following privacy policy.
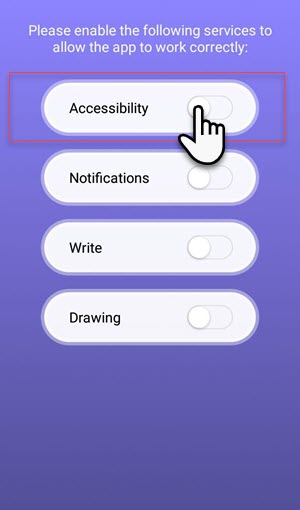
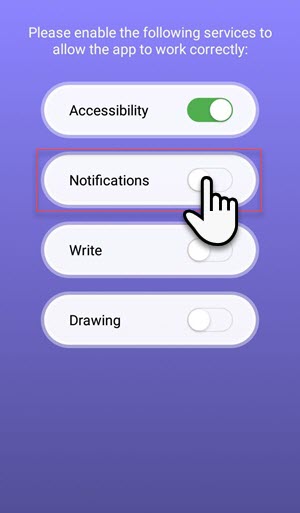
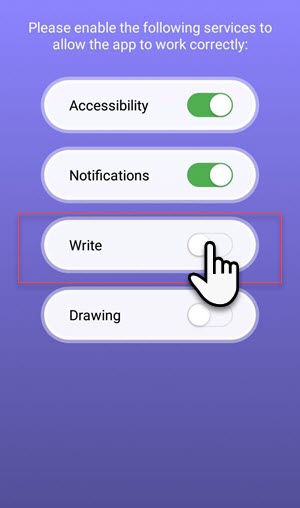
Step-5:Now you got Four Option [1. Accessibility 2.Notifications 3. Write 4. Drawing]. ON on the Accessibility Option.
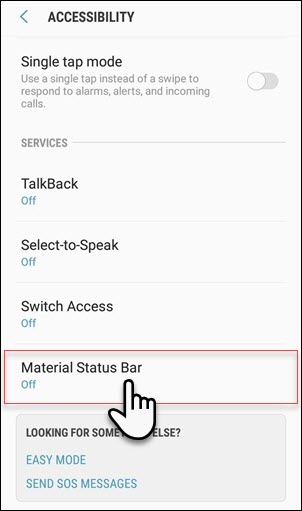
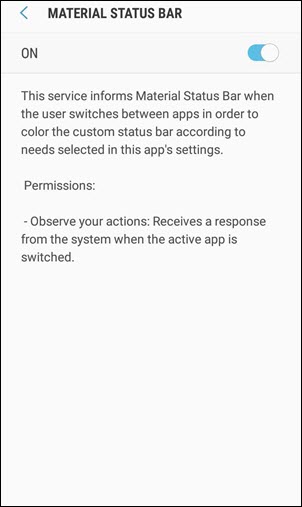
Step-6:Enable the Material status bar .
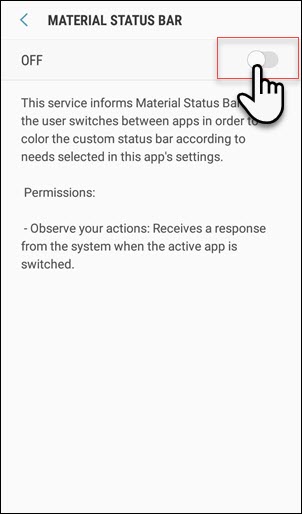
Step-7:Then, on the option like below screenshot.
Step-8:After on this, that will show like below screenshot.
Step-9:Then ON the “Notifications” option .
Step-10:The access the Notification and enable Material Status Bar.
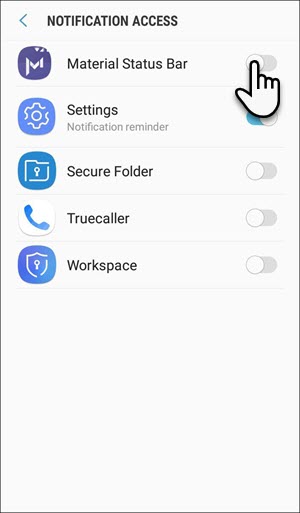
Step-11:When Enable this a new pop of window is open it says“Allow Material Status Bar “

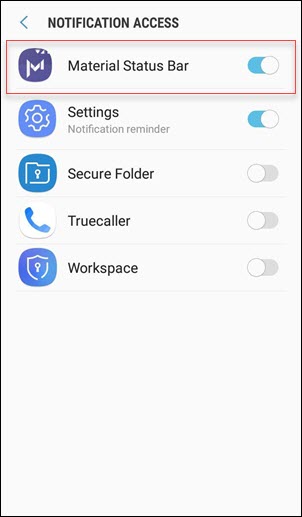
Step-12: Again Enable this same as Step-7. Then click on the back button.
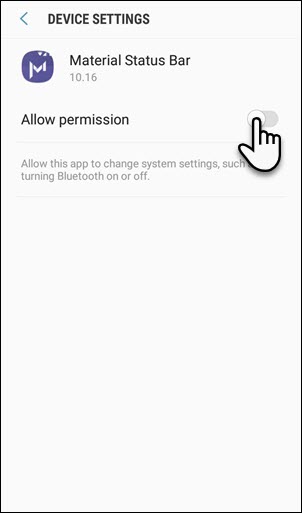
Step-13: Then go to Enable write Button .
Step-14: Allow the permission, the below write like ” Allow this app to change system settings. Such as turning Bluetooth on or Off “. Then hit on a back button.

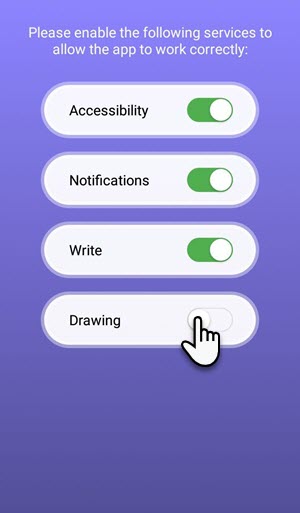
Step-15:Finally, swipe the drawing button. Now you will see the button color green.
Step-16:Allow the Permission manager .
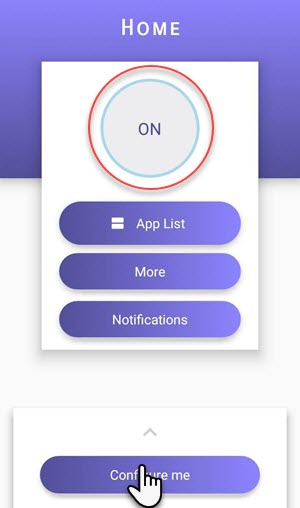
Step-17:After doing all the steps above, the application has begen.
Step-18
This step we share some tips to customize your software
- In hand number 1, that means to enable the battery percent.
- In Number 2, that means to enable the Clock on the status bar.
- In Number 3, which means that the clock is enabled in the 12-hour format.
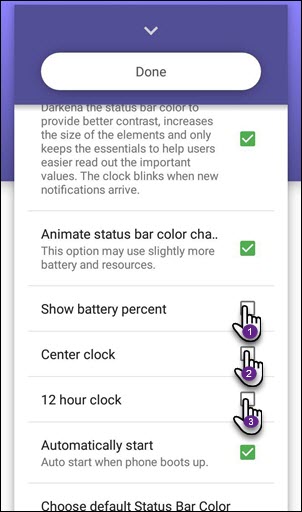
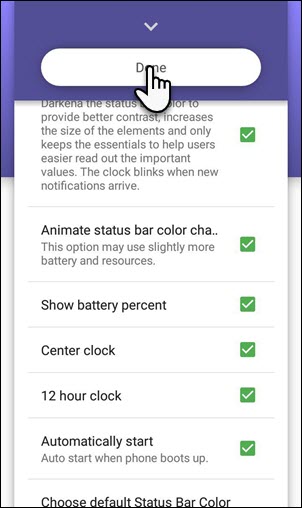
Step-19: Finally Click on Done Button .
# 2. Change Material Status Bar on Rooted Device
All known are X-posed is one of the great app for rooted Android devices. Who can help Android devices to amend it?
There are many X-posed modules available in the market. Some are popular modules are IMEI changers, Device emulators and much more
Android devices have many great apps that can turn your device into a new device. You can modify your Android device by changing application theme, flash custom roms, launcher and much more.
By Use X-Posed Module
This is an app that runs in many Android gadgets. I have examined this app in my Redmi Prime. This app can also work on your Android device.
Of course, you can customize your status bar, add custom text color, font style etc.
Now I’m going to give an explanation for this tutorial with the help of an easy Android Xposed module.
No coding capabilities are needed to use this app. But active Xposed module is important thing.
Step-1: At First, Install Xposed Framework in your Android Device.
Step-2:Then Install Xposed Status Bar Module App on your device.
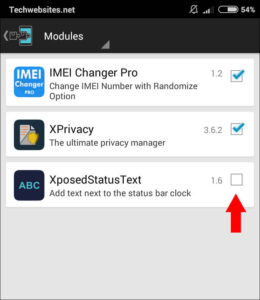
Step-3:After doing above two step After that Simply Open Xposed, Goto Modules, and Tick on Xposed Status Text and Restart your Device.
Step-4:After Complete Restart your Phone open Status bar text apps from your phone and Add your Custom text.
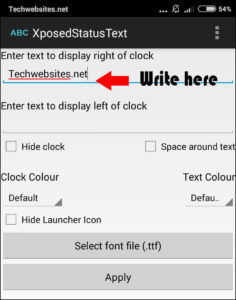
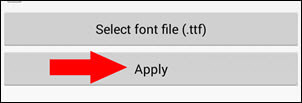
Step-5:Apply for any color, select position and select any other options of and tap apply.
This was the manner which you may use for add status bar in android gadgets without rooting it. you may add any cool text for your status bars like your name or any other message so that you will not forget it. remember that it requires root access, which is kind of advanced element.
If you are not a better user on Android, please do not try a rooted guide because it is bickering your device and I am no longer liable for anything.
Final Verdict
If you have more questions or guidelines about this guide, please comment below, I will try to help you.
Thanks for visiting and staying on this blog to get more cool stuff related to Android.
This site was… how do I say it? Relevant!!
Finally, I’ve found something which helped me. Appreciate it!
Thanks, Bro